As promised, Bonnie & Trish from Uncommon . . .
Bonnie and I are so excited to be here on Life as a Thrifter! We have a necklace tutorial for you that is both simple and super thrifty. My favorite combo!
Have you seen the fabric covered beaded necklaces popping up out there? I love them! Here was one that really caught my eye by Ruche.
Bonnie and I are so excited to be here on Life as a Thrifter! We have a necklace tutorial for you that is both simple and super thrifty. My favorite combo!
Have you seen the fabric covered beaded necklaces popping up out there? I love them! Here was one that really caught my eye by Ruche.

I was shopping the clearance section of Wal-Mart yesterday and found a gorgeous peacock knit shirt and a set of beads to use to make one of my own. Here is how it turned out... I can't wait to wear it to a Mother-Daughter Valentines Brunch this weekend. So sweet!

Jersey Knit Garland Necklace Tutorial
- T-shirt or fabric of your choice
- Matching Thread
- Beads
- Scissors and/or Rotary Cutter
- Turning Instrument (optional)

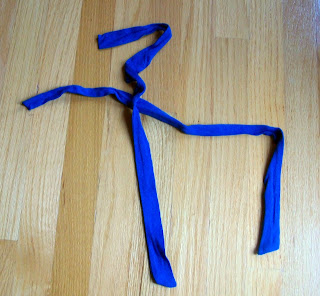
Make two casings about 1 1/2 inches wide and sew one end shut. I got lucky and could just snip the ties off of the shirt. Don't you love it when that happens? Make it as long as you'd like, depending on how long you want your necklace to be. Keep in mind you are going to use a good bit in the knots so be liberal.

Turn the casings inside out. I used a turning tool. You'll see it a couple of steps down. If you ever make ties for anything, this is a lifesaver!

Now you want to close the casing smaller where the beads go in. Start where you want the knots to begin and sew a diagonal line and then all the way down to the open end. this will give you a thick tie, but a tight grip on the beads.

This is what your two casings should look like after you resize them.

Now, turn both casings right side out. See my handy turning tool above.

Tie your first knot. You want to space this to leave plenty of room to tie on the necklace.
 Slip a bead through the casing down to the knot. Tie a knot next to it. Continue doing this with both sides until you have an inch or so left near the opening. Now, place one casing inside the other (shown above) and sew it down.
This is what your necklace should look like at this point. Ignore my knees in the photo!
 Now, cut several strips and tie them on to the necklace where you would like them to go. I used strips that were about one inch by five or six inches. They don't have to be perfect. Use as many until you reach the fullness that you like. Make sure to tie some strips where you joined the two sides together. You are done!
I had to take this picture of myself so excuse the picture quality, but you get the idea! I even have the bottom portion of the t-shirt left to make my oldest a skirt. All I have to do is make a casing and sew in some elastic. Gotta love Wal-Mart! I scored a few more beauties that I will show you soon!

Thanks, Bonnie & Trish!
Don't forget to stop by Uncommon
to check out more!
If you have a fun DIY or thrifty redo and would like to be considered for The Blog Post Trade-Off, please e-mail me at lifeasathrifter@yahoo.com.


I love this idea! I've seen the beads inside the fabric tube style necklace but never with the extra fabric detail. It looks lovely!
ReplyDeleteInteresting discussion . For my two cents , if your business are interested in merging of are interested in merging of , my business used a service here altomerge.com.
ReplyDelete