12.31.2012

Dollhouse Details: The Family Room

Let me just start by saying, you can so do this. 
Really. I told you before, the worst part was putting the house together...if you've spent anytime on Pinterest, then you already know the many other options you have out there...or, maybe you'll just be lucky enough to find one in the the thrift store!
So, let me break it down a bit...


...starting with the family room.
These were the bags of wooden furniture Fleming found for me months and months ago I'd been saving for this project. (And, that does read $3.00, by the way.)
Most of the house's furniture is from here.


I added a couple little pillows I made out of scrap fabric to the couch and chair and laid down one of those old granny squares from my unfinished afghan as a rug.


I used spray adhesive to adhere all the wallpaper.
In this room I used aqua scrapbook paper.
The silhouette you see was left over from Ross's 1st birthday party (almost two years ago) and the SC picture was simply traced then colored on scrapbook paper. I used Command strips to attach both.


The fireplace was also part of the wooden furniture pack that I simply painted white.
Hobby Lobby has a fair amount of accessories. I found the two little mirrors there for under 3 bucks.


I have to add, I found these at the flea market a few weeks ago...and was completely beside myself.
Daddy...Mama...Ross...and Gram.
You'd think it couldn't get anymore perfect...


...but then I ran across this pink bug at the thrift store not 1 week before Christmas...complete with babyseat.
(Can I also add, it was $.50?)


That's when I knew this dollhouse was truly meant to be.
Stay tuned for more...

Pin It Now!

12.28.2012

The Dollhouse

If you follow the Facebook page, then you may have seen this first pic several weeks ago...and I wish I could tell you it was way easier than it looks...but honestly, it wasn't. My first clues, of course; were the two different price tags hanging above it in Hobby Lobby...

 $99.00 in the box.
 $330.00 assembled.

I'll confess, it probably would have been worth every penny to be assembled.
But, we finally managed to pull it together by Christmas morn...


I'll be back with a few more details on this soon...

Pin It Now!

12.24.2012

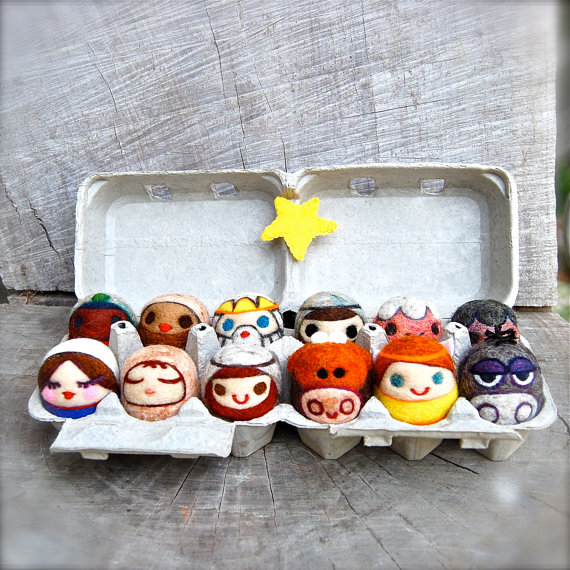
The Sweetest Nativities


It's hard not to get wrapped up in all the shopping and presents, but when it really comes down to it, there's only one reason there's such a thing as Christmas...

{etsy}


{etsy}


{etsy}


{etsy}


{etsy}


{etsy}

For to us a child is born, to us a son is given, and the government will be on his shoulders. And he will be called Wonderful Counselor, Mighty God, Everlasting Father, Prince of Peace.  Of the increase of his government and peace there will be no end. He will reign on David's throne and over his kingdom, establishing and upholding it with justice and righteousness from that time on and forever. The zeal of the LORD Almighty will accomplish this.
Isaiah 9: 6-7 

Wishing you the best Christmas ever...

Pin It Now!

12.21.2012

On the Chalkboard

Changed up the chalkboard a bit this year...


and was thrilled to pull out the advent calendar.
It's been extra fun now that Ross is finally reaching the age where it excites her...too.


Pin It Now!

12.19.2012

Wednesday Redo: Tree Stands


I've gotta hand it to my bud Kelly...I never would have thought of this.


Get all the details HERE...and, even better, 
check out all her unique Christmas trees HERE!

Pin It Now!

12.17.2012

EASY Photo Ornaments

Well, I know you remember these from last year...
They're just so simple...and such great gifts...I can't let the season go by without a little recap.


Here's what I did:
Using plain, glass ornaments (or unbreakable...whichever you prefer)...


I simply rolled up my photo and eased it inside.

Now, let me note, you will need to experiment with the size of your photo. I used trial and error- starting large and slowly cutting down to size until it fit the way I wanted. I used a pair of tweezers and a pair of scissors to manuver it around and flatten it out. It took a little practice, so be sure you have extra copies just in case you accidentally tear one while pulling it back out. I found that rolling it back up, then twisting and pulling was the easiest way to get it back out.
Or, if you plan on making a lot of them, try creating a pattern with cardstock first, then cutting your photos the same size.


They've become a bit of a tradition around here...as a way to keep and display each year's Christmas card photo.

Pin It Now!

12.14.2012

The Little Christmas Tree

We started a new tradition this year.


One that involves a little tree...


...and a little girl.


And, I'll be honest, watching her with it kinda makes me want to put one in my room, too.


What about you?
Have you started any new traditions this year?

Pin It Now!

12.12.2012

Wednesday Redo: Mason Jar Lid Garland

Thrifting or not, these are certainly an easy find.


But, I never would have thought to use them this way! 
Can you imagine the possibilities???

Find out how Alyssa from My Clever Nest created these HERE.

Pin It Now!

12.10.2012

Christmas Mantel


Well, I already confessed my Christmas decor has remained mostly the same this year (due to the nursery overhaul), so you may be dissapointed to have already seen this. But, I'll be honest, it would have been hard to part with it anyway...I only see it one month a year...and I was thrilled to get it out again.

(Check out the tutorial links at the bottom.)


Want to make...


Pin It Now!

12.07.2012

NOT-SO Ordinary Christmas Mantels

I love the usual bushy strand of garland, but how FUN to have something out of the ordinary! No doubt, these guys made it happen.


{HGTV}


{BHG}


And also, thank you, thank you for all your repins on the AT House Tour. Believe me, it was dumbfounding to see it there in the first place, but it's been your overwhelming support that has truly left me astonished!

You are wonderful.

Pin It Now!

12.05.2012

Top 10 AT House Tours!!


Okay, okay...I clearly know what a shot in the dark this is...but, Christmas miracles CAN happen, you know...
Apartment Therapy notified me that I was in the running for being one of the Top 10 AT House Tours of 2012! After I came to my senses and picked my mouth up from the floor, I thought I might spread the word...in the hopes that maybe, just maybe it happens. In other words...Life as a Thrifter readers, I need you!

Here's how YOU can help:

1. FOLLOW Apartment Therapy's "Reader's Choice Top 10 House Tours of 2012" Pinterest Board. (You can find that HERE).

2. Find my house tour on the board and REPIN it!

That's it.
So simple.
Nothing to it...
Right?

Ah, it's worth a shot...in the dark. :)

Pin It Now!